Tuesday, February 26, 2013

Lemony Moroccan Quinoa with Lamb Sausage and Yogurt-Mint Sauce

Bold claim: this is probably my favorite recipe I've posted on this site to date. It may be because I'm secretly proud that I dreamed up an ethnic dish without any inspiration recipes; it may be because I was ravenously hungry when I made it; but I think it's just because it's really darn tasty!


As with a lot of my cooking, this dish was inspired by trying to think of a delicious way to prepare one particular ingredient I had on hand; in this case, lamb sausage. I like lamb but had never actually cooked it before. I could have taken the easy way out and just grilled it and served with some veggies, but I felt like a special ingredient deserved some special attention. So I came up with the idea of pairing it with dried apricots for that sweet/savory contrast I love so much. And from there the ideas just kept on flying... I'll serve over quinoa! With pistachios! And what kind of flavors? Lemon! And mint! And because I was concerned it might be a bit dry and I love yogurt oh so much, I'd top it all off with a yogurt sauce! It was a done deal; all I needed now was to hit up Trader Joe's for the ingredients.


Well, after about two hours of wandering like a kid and a candy store, I finally emerged from the TJ's black hole ready to make my dreams a reality. The dish came together quite easily; the hardest part is just timing it all so it's done at the same time. Here's the game plan I'd suggest:

Get your quinoa cooking on the stove first (just follow the instructions on the package). Then start chopping so you have everything ready to go: onions, spinach, mint, pistachios, and apricots. Next, spray the bottom of a skillet with olive oil or cooking spray and sauté your onions. When almost cooked, add the spinach. Meanwhile, put the lamb sausage on the grill. I used my Foreman, but if you don't have one and it's not outdoor grilling season (which unless I have any Florida readers, it's not...), you could also put it under the broiler or just cook it in a frying pan. No matter which method you choose, be careful not to overcook as lamb sausage can get dry and tough if cooked too long.


Once the quinoa is cooked, add the sautéed veggies, half the chopped mint, the pistachios and apricots, some lemon juice, cumin, allspice, and just a dash of salt. Fluff with a fork.

As your lamb finishes up, mix the yogurt sauce by combining yogurt, lemon  juice, the rest of the mint, and minced garlic. Serve the lamb sausage over the quinoa and top with the yogurt mint sauce. 

The dish really looks and tastes more complex than it is, making it a perfect choice for serving at a dinner party. Or keep this gem all to yourself an enjoy with a nice glass of wine - you deserve it!


Lemony Moroccan Quinoa with Lamb Sausage and Yogurt-Mint Sauce
(Makes approximately one dinner serving plus enough for lunch paired with a side) 

For the quinoa: 

3/4 c uncooked quinoa
20 pistachios, chopped
5 dried apricots, cut into small pieces
6 mint leaves, chopped finely
1/3 c onion, chopped
Handful of spinach, sliced into small strips
Salt and pepper to taste
1/4 tsp garlic powder
1/8 tsp all spice
1/4 tsp cumin
1.5 tbsp lemon juice
1 large or 2 small/medium links of lamb sausage (omit for a vegetarian dish)

For the yogurt sauce: 

1/4 c plain greek yogurt
6 mint leaves, chopped finely 
Salt and pepper to taste
1/2 tsp garlic powder
2 - 2.5 tsp lemon juice

Cook quinoa according to directions on package. In a separate pan, sauté chopped onions. When almost translucent, add spinach and cook until wilted. 

Grill lamb sausage until cooked all the way through. 

When quinoa is cooked, add in sautéed vegetables, pistachios, apricots, mint, spices, and lemon juice. Fluff with a fork. Top with sliced lamb sausage. 

Mix ingredients for yogurt sauce. Spoon on top of the lamb and quinoa. 

Friday, February 22, 2013

Restaurant Week at The Oval Room

Restaurant week is one of my favorite times of the year as it incorporates two things I really love -- delicious food and a good bargain! For DC restaurant week, you get a multi-course meal which you choose from a set menu for around $20 for lunch or $35 for dinner. If you do your research and choose right, you can end up saving a lot of money dining at a restaurant you otherwise probably couldn't afford. Since living in DC, I've done restaurant week at Cedar, Rasika, Zaytinya, and this year -- The Oval Room

Overall, I was really pleased with my experience at The Oval Room! According to their website, "The Oval Room is a critically acclaimed restaurant serving modern American cuisine with Mediterranean influences," but the real draw is that it's a fancy shmancy restaurant very close to the White House and the Oval Office. Another plus for me, they serve a good deal of seafood, and you know I feel about seafood!

Time to break down the meal... I was lucky to dine at Oval Room with one of my best friends who is a) not a picky eater and b) a good sharer, so I got to try two options for each course. For the appetizer, we got scallop crudo (raw scallops) with fennel, yuzu, chili & charred bread and poached shrimp with spicy tomato jam, horseradish, and lemon tapioca. The scallops themselves were absolutely amazing -- I don't know how to describe them any other way. You may be nervous about eating scallops raw, but the texture is not at all gummy and the taste is not "fishy." The flavors of the accompanying sauce were good, citrusy. But I personally preferred the flavors that were paired with the shrimp. The spicy tomato jam was delicious -- I wiped the plate clean -- and the lemon tapioca was a refreshing change of pace. However, the shrimp itself was nothing special. Not bad, just somewhat bland.

On to the main course, probably my favorite of the meal. We knew immediately that we wanted the salmon with grilled kale, crushed root vegetables & sherry maple emulsion. The salmon was perfect. Crispy on the outside, melt in your mouth on the inside. And the portion was very generous -- two substantial pieces. The kale was surprisingly a stand out part of the dish as well, much better than expected, while the vegetables were just fine but nothing to write home (or in your blog) about. 

Our second entree was the miso braised pork shoulder, which according to our waiter, was braised for an insanely long time (not his exact words). It was served with turnips & ancho chili condiment. The pork was incredibly tender, just fell apart in you mouth, and had very good flavor. A few small complaints though. There were about 3 teeny tiny turnips (which weren't anything that special) and the "condiment," though very tasty, was scant. Therefore, the dish was pretty much just meat. If I had only ordered this dish and didn't have the salmon dish to add some additional flavors to my meal, I may have been a tad disappointed.

Finally, time for dessert! I have an insane sweet tooth so we had the hardest time narrowing it down to just two. They all sounded amazing! We ended up deciding on the raspberry white chocolate torte with raspberry ice cream & pistachio crunch and the key lime cheesecake with berry coulis and graham cracker ice cream. Maybe I had too high expectations but the desserts, though enjoyable, didn't stand up to the high standards set by the appetizers and entrees. The raspberry ice cream was good, but the torte was just okay and didn't taste like white chocolate. Meanwhile, the cheesecake was yummy and creamy, but didn't taste like lime. And the berry I tasted was actually not good. But that's being extremely picky. If I wasn't tasting these desserts with the intent of critiquing them, I'm sure I would have simply said they were tasty!

I had a great time dining at The Oval Room and would definitely recommend it as a top restaurant week value. In addition to the delicious food, the service was definitely what you'd expect from a gourmet restaurant and the ambiance was upscale without being too stuffy. And most importantly, the company was superb!

Tuesday, February 19, 2013

Pizza Pinwheels

Pizza Pinwheels! These were fun to make and a definite crowd pleaser! They're totally versitle -- they'd be a great after school snack, tailgate treat, game night appetizer, or cocktail party hor d'ouevre. Practically everyone loves pizza and the cute little design of these things makes them THAT much better ;) 

Take some crescent dough (both regular or reduced fat will work fine
) and roll it out onto a sprayed baking sheet. I used both a rolling pin and my hands to make it work.  In a bowl, mix together tomato sauce, shredded parmesan, shredded mozzarella, oregano, parsley, garlic, and salt (fresh herbs would be great but dried worked just fine). Spread this over the dough. Now you can choose to stop there or top however you please! If I had pepperoni or turkey pepperoni, I probably would have used that, but I only had turkey bacon and that worked just fine. You could also spread cooked chopped spinach on here for some added nutrition. I imagine goat cheese, feta, or sundried tomatoes would be delicious too! 

Now roll up the crescent dough lengthwise so you have a long skinny roll. Cut into 12-16 pieces using a pizza cutter or sharp knife. If it starts to get too soft to cut, stick it in the fridge for a few minutes. Put the rolls onto a sprayed cookie sheet and bake. These are most delicious served hot straight from the oven, but I can't really speak to how they are as leftovers because there were none! 


A bit messy but still delicious!


Pizza Pinwheels
1 package of refrigerated crescent dough
1/2 c. tomato/pasta sauce 
1/4 c. shredded parmesan cheese
1/4 c. shredded mozzarella 
1 tsp dried oregano
1/2 tsp dried parsley
1 tsp garlic powder
Salt, to taste
1 1/2 pieces of cooked turkey bacon, crumbled

Preheat oven to 350 degrees. On a sprayed cookie sheet, roll out crescent dough into a thin rectangle. Mix together tomato sauce, cheeses, and spices. Spread over the dough. Sprinkle crumbed bacon evenly on top. Roll into long, thin tube, and slice into 12-16 pieces. Spread out rolls on the cookie sheet. Bake in oven for 15-17 minutes until dough is cooked. 

Saturday, February 16, 2013

Zucchini Ribbons with Toasted Almond Pesto


So I might be the only 25 year old who asked for a cookbook, a tea infuser, and Good Housekeeping magazine on her Christmas list... (Don't worry, I'm not a total grandma; I also had a new bell for my bike and trapeze lessons on there). Lucky me, Santa brought me a few of these requests, one of which was the cookbook -- the Smitten Kitchen cookbook to be exact. You've heard me talk about my love for Deb Perelman before, so it may not surprise you to learn I spent a good hour or so of my Christmas day paging through each and every recipe of the book. Almost every page turn was met by an "oohh," "ahhh," or "wow that looks good."

This was one of those recipes. I followed it pretty closely, making only a few slight adaptations, and was definitely pleased with the results. I really loved the taste of the toasted almonds, which was complemented perfectly by the parmesan cheese. Additionally, the texture and the nutty flavor of the pesto paired very nicely with the delicateness of the zucchini ribbons.  

First, you toast almonds in the oven for approximately 15 min at 350 degrees. After they've cooled slightly, put them in a food processor with grated parmesan, garlic, salt, and red pepper flakes and puree until fine. Then mix in the lemon juice and olive oil to make a pesto. 

Using a mandolin grater (or verrrrry carefully by hand), slice the zucchini into thin long strips. Coat the strips with the pesto by dolloping on a little at a time and mixing until the zucchini is coated.  Not going to lie, I ended up using my hands here.

A word of warning - make sure you're ready to serve immediately when you do this. I let mine sit for a little while I finished prepping the rest of my meal, and the moisture from the zucchini watered down the pesto a bit and the almonds weren't quite as crunchy. This dish would make an impressive first course for a dinner party, or you can do what I did and serve it with grilled ham over parsnip puree!


Zucchini Ribbons with Toasted Almond Pesto
(Minimally adapted from The Smitten Kitchen Cookbook; serves 1 generously, 2 as a modest starter or side)

1 medium zucchini
6 almonds
1 tbsp grated parmesan cheese
Pinch of red pepper flakes
Pinch of salt
1 garlic clove
1 tbsp olive oil
1 tsp lemon juice

Toast almonds in 350 degree oven for 15 minutes. Grind in food processor with parmesan cheese, red pepper flakes, salt, and garlic until fine. Mix in olive oil and lemon juice. 

Slice zucchini into long, thin strips. Coat with almond pesto. Serve immediately. 

Wednesday, February 13, 2013

Grilled Ham with Rosemary Parsnip Puree


Just a quickie post for you today - grilled ham over rosemary parsnip puree. Or in reality, it's just a recipe for rosemary parsnip puree because the ham recipe is as follows: Grill. Eat. ;)

Anyway, this puree tastes rich, almost like it has quite a bit more butter in it than it actually does. I'm excited to try mixing some parsnips into mashed potatoes or mashed cauliflower to see if it adds that same flavor.

All you have to do is peel the parsnip and slice into pieces that are about 1/2" thick. Place in a covered dish and microwave for about three minutes until soft. Put the parsnips in a food processor with the milk and butter (or if you don't have a food processor, you could use a hand mixer or potato masher). Blend until smooth; you may choose to add more milk if you'd like a thinner texture like a more traditional puree but I liked it on the thicker, heartier side. Finally, mix in the spices, spread on the plate, and top with the grilled ham.


Grilled Ham with Rosemary Parsnip Puree

1 medium parsnip, peeled
1/4 - 1/2 tsp butter 
2 1/2 tbsp milk
1/4 tsp dried rosemary
1/4 tsp salt
1/4 tsp garlic powder

Slice parsnip into 1/2" slices and place in covered dish. Microwave for 3 minutes until soft. Put into food processor with milk and butter. Pulse until smooth. Add more milk if thinner texture is desired. Mix in spices. Spread on plate and top with grilled ham. 

Sunday, February 10, 2013

Creamy Pumpkin Sage Pasta


I know it's customary for pumpkin recipes to flood the Internet in October/November and all but disappear with the coming of the new year, but hey, I'm an equal opportunity pumpkin eater. I don't believe in relegating delicious food to only specific times of the year (hence the reason I enjoy a nice bowl of ice cream quite frequently in the middle of February...)

Back in the fall, I went pumpkin picking and found a lovely little pumpkin that I proceeded to use in about a hundred different ways. First, I had a pumpkin painting day with some family and friends. Then I used it as festive decoration in my apartment. Once it served it's purpose there, I decided to wash off the paint, chop it up, and roast. I used some of the roasted pumpkin for side dishes, seasoning it in a variety of ways. The rest, I puréed and froze for later use. With a hankering for a hearty meal and some chicken sausage that needed to be used up, I pulled out one of the frozen containers the other day and whipped up this creamy pumpkin sage pasta with chicken sausage and peas recipe. Don't be discouraged if you don't happen to have any frozen pumpkin puree in your freezer. You could buy a can of pumpkin puree (not pumpkin pie filling) or even better, roast a bunch of butternut squash and puree half to make this for dinner and save half to make this salad for lunch the next day!

The dish is extremely simple: cook pasta (any kind of rotini, ziti, etc. will do) until al dente; reserve a cup or so of the water before draining. Then, sauté chopped onions. Meanwhile, combine your puree and with cottage cheese in a food processor and blend until smooth. Don't worry if you aren't a fan of cottage cheese; this doesn't actually taste like it. That's just what gives the recipe the creaminess. Once the onions are cooked, turn down the burner to low and add the pumpkin mixture to the pot. Add all of your seasonings and stir. Add the pasta to the sauce and stir once again. Slowly add in some of the reserved pasta water, stirring frequently, to loosen the sauce a bit until you've achieved your desired consistency (all noodles should be coated). I ended up using about 1/4 c.

At this point, you have some customization choices. If you'd like to use this as a side, you can stop there and just top it off with some shredded parmesan cheese. However, I wanted to make a meal out of it so I sliced and heated a link of precooked chicken sausage (mine was Wegman's brand but I'm also a fan of Al Fresco and Trader Joe's) which I added to the pasta along with some frozen peas that I zapped in the microwave. If you don't care for peas, I'd assume chopped spinach or cauliflower would also work, but the pumpkin, sage, sausage, peas, and parmesan flavor combination is highly recommended... by yours truly! 

Before getting to the recipe, time for another quick restaurant review -- I recently lunched at Merzi in Penn Quarter and was really impressed by how good it was for being essentially a fast food joint. It's essentially an Indian version of Chipolte; the food is made-to-order as you progress down the line. You have your choice of meat (or can go vegetarian), veggies, warm sauces, and cold chutneys served as a naan roll, rice bowl, chaat (over chickpeas, onions, peppers, and potatoes), or salad. I got the lamb chaat with all the veggies, spicy masala, tamarind chutney, and yogurt sauce, and would definitely go back to try more. It's quick, healthy, delicious and cheap so fingers crossed they decide to open more locations in the future. Check it out and let me know what you think!


Creamy Pumpkin Sage Pasta with Chicken Sausage and Peas
(Makes approximately 2 hearty or 3 modest servings)


2 1/4 c uncooked pasta 
1 c pumpkin puree

1/4 c cottage cheese
1/2 TSP sage
1/4 TSP pepper
1/4 TSP nutmeg
1/2 TSP garlic
1/2 TSP kosher salt

1/2 c frozen peas, microwaved according to package
1/4 c chopped onion 
Parmesan cheese
Chicken sausage

Cook the pasta in a pot of salted boiling water until al dente. Reserve a cup of the pasta water and drain. 


Meanwhile, combine pumpkin puree and cottage cheese in a food processor and blend until smooth. Saute onion over medium heat in a sauce pan until nearly translucent. Turn heat down to low. After a minute or so, add pumpkin sauce and spices and stir. Add cooked pasta and peas, stirring again. Slowly add in the reserved pasta water until you reach your desired consistency for the sauce. Serve topped with cooked chicken sausage and parmesan cheese. 

Wednesday, February 6, 2013

New England Clam Chowda

Believe it or not, just a year ago I didn't eat any seafood. Shrimp, fish, scallops, crab... I wouldn't touch it. I ate some seafood as a child -- fish or tuna noodle casserole -- but one day I just decided it was gross and never looked back. Fast forward fifteen years, and I found myself living in the Chesapeake Bay-area and, as a non-seafood eater, I felt like a fish out of water (sorry, pun intended...). About a year ago, I finally convinced myself that as someone loves all other kinds of food, I had no reason to let fear stand in the way of enjoying an entire genre of food, and I needed to give it a go. I slowly tasted a few things here and there, and then about six months ago, decided to throw caution to the wind and start testing out seafood whenever I had the chance. That was one of the best decisions I've ever made. 

I haven't gotten around to trying absolutely everything yet, but crab cakes, tilapia, shrimp, sea bass, scallops, smoked salmon... I love it all! So back in October, while on a girls weekend getaway in New England, I tried a lobster roll and bowl of New England clam chowder, and ever since, I've been wanting to make my own. Well, lobster is quite expensive, but I recently decided to give the clam chowder a whirl!

I'm not sure why I thought that one experience with clam chowder qualified me as enough of an expert to not follow a recipe, but I was determined to create my own recipe! I knew what I wanted -- I wanted it to be light enough that a bowlful didn't make you feel overstuffed but still creamy like a New England clam chowder should be. I wanted it to be easy (AKA I wasn't dealing with live clams). And I wanted it to be full of veggies. Now, a true stickler from New England with very specific criteria for their chowda might not approve of this recipe, but I definitely enjoyed it and I served it to a born-and-raised Mainer who helped herself to seconds so that's good enough for me! 

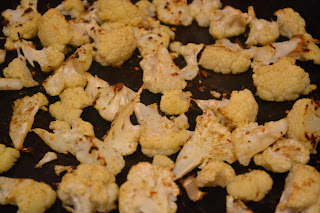
I started by chopping and sauteing onions, carrots, and parsnips in a gigantic pot. After a few minutes, I added some celery, and after a few more minutes, red pepper. Meanwhile, I chopped cauliflower into florets and steamed it in the microwave until soft. I blended the cauliflower with some fat free half and half in a food processor to create a puree that would help thicken the soup. 

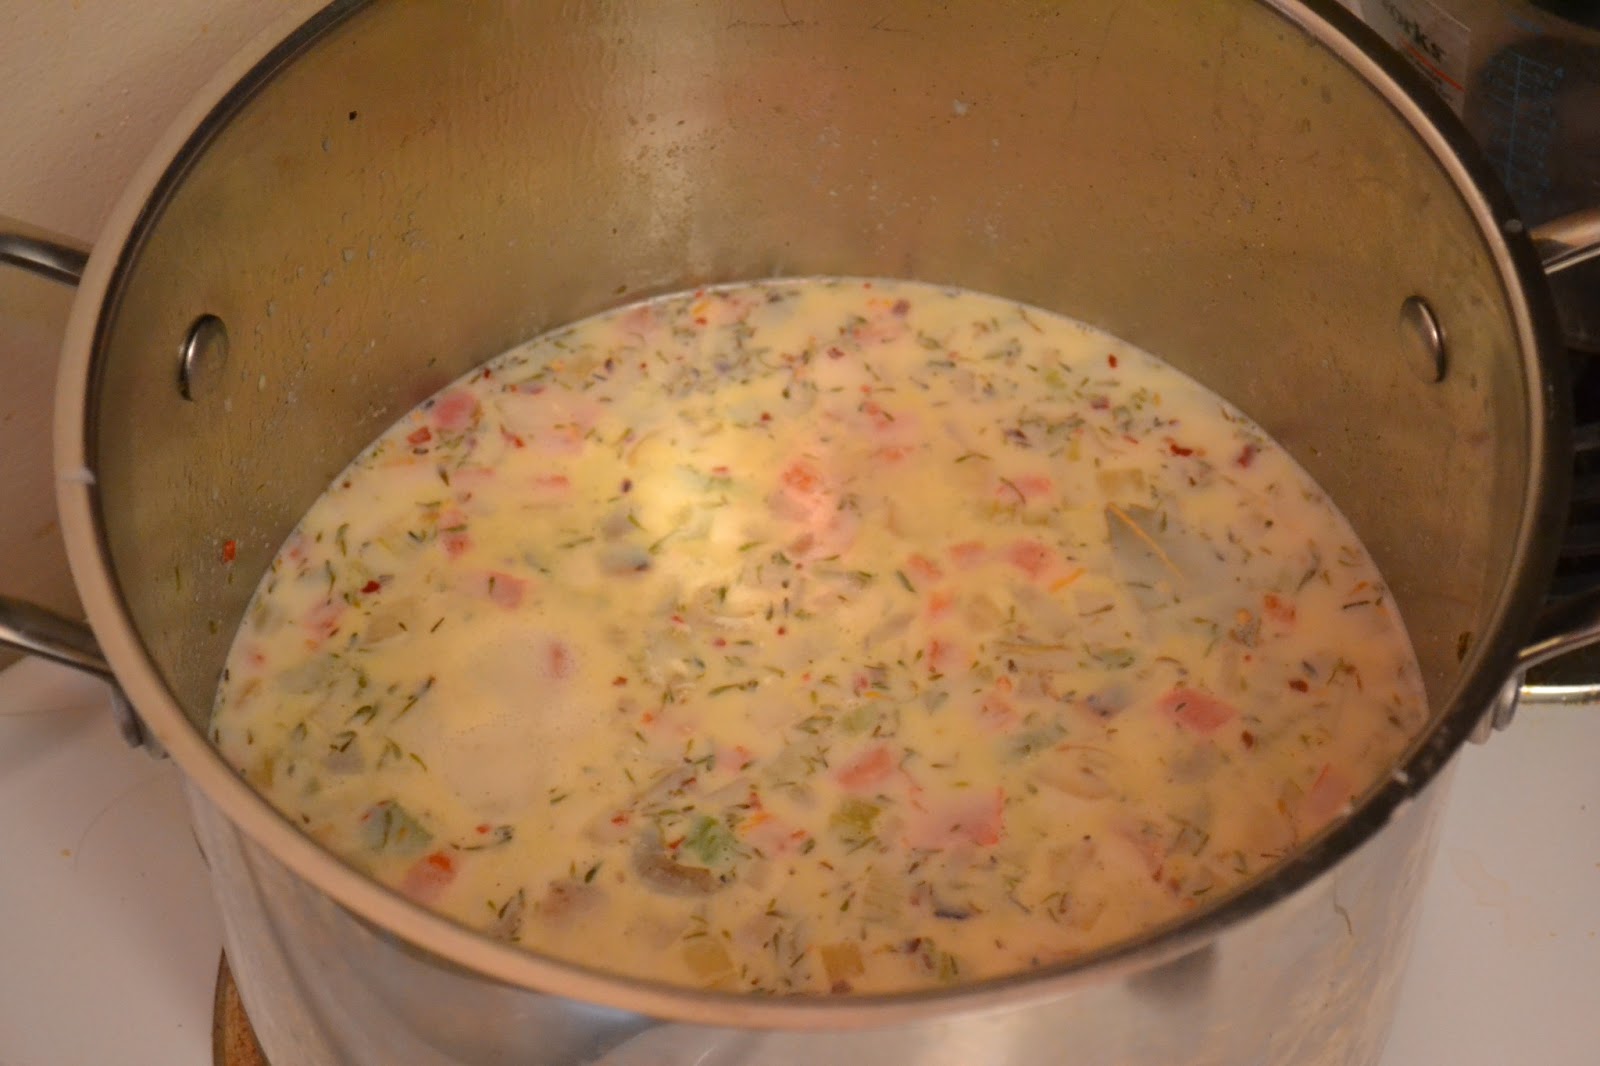
Once the veggies were getting tender (but not mushy), I added in the broth (I used chicken broth because I didn't have any vegetable), milk, and cauliflower puree as well as bay leaves, thyme, salt, pepper, and red pepper flakes to taste. I let this simmer on low heat, stirring occasionally, for about 15 minutes. It wasn't quite as thick as I wanted, so I added in additional half and half and some cornstarch to thicken it up. At this point, I also added in a small can of corn (drained), a can of potatoes chopped into small cubes, and two small cans of clams (one of which I totally drained and one that I left most of the liquid in for additional flavor). 

Continue to let the soup simmer as you stir occasionally for at least another 10 minutes or so. Taste test to judge if you want to add additional salt, pepper, or red pepper flakes or if it needs any more cornstarch to thicken. (Tip: when adding cornstarch, do so slowly and with a whisk so you don't get lumps in your soup.) 

Some notes: you don't need to use all of the vegetables I used if you don't have them. Whatever you like will work! Also, if you want to cook your own potatoes rather than using ones from a can, you can add them as soon as you add the liquid to the pot and cook them in the broth. If you're feeling really adventurous and want to use fresh clams, more power to ya! You'll have to google a recipe though, because that's one thing I still haven't attempted... 

I intended on using some turkey bacon in this recipe as well but simply forgot, so I cooked a piece afterward and sprinkled it on top, but I have to say, I didn't really like it. I also added some hot sauce to see how that would taste but didn't care much for that either. I liked this best plain and simple, with just some crackers or toasty bread for dipping and a salad on the side. Hope you enjoy this chowder as much as I'm enjoying exploring the wide world of seafood!


Round two of many on the Lazy Susan 

Speaking of seafood... I mentioned in the introductory post that I'd also occasionally blog about reviews of restaurants and products. Well I recently took a trip out to Falls Church, Virginia to Fortune Seafood for their weekend dim sum brunch and wanted to report back. (Apologies to those who don't live near DC as my restaurant reviews will almost exclusively be from this area, but that will just give everyone even more reason to come and visit!). For those who have never been, dim sum is more than a meal; it's an experience. As soon as you sit down, you are swarmed by carts of 
dumplings, rolls, noodle dishes, buns, etc. The servers buzz around the room at the speed of light, offering you their delicacies with little explanation of what you'll be eating. If you accept, they stamp your table's card to keep track of what you've purchased, hand you the food, and are off to the next table before you can blink an eye. It can be a bit overwhelming, but it is definitely delicious, fun, and adventurous! If you haven't been, I highly suggest it, and Fortune is a great place to start. Yes, Falls Church is a trek, but it's worth it if you want the authentic dim sum experience that you just can't find in the city. Don't expect anything fancy or particularly charming but do expect to leave super full and satisfied for a very reasonable price. That being said, I don't suggest going if you have a lot of dietary restrictions or aren't a huge seafood fan -- many of the dishes are from under the sea. My favorite dish was the banana shrimp rolls, but the bok choy, coconut mango buns, and crab meatballs were also memorable. If you head out the Fortune, leave a comment letting me know what you think! 


New England Clam Chowder


3 cups 1% milk 
3 cups chicken or vegetable broth
1/2 c. fat free half and half, divided
8 oz can of corn, drained 
15oz can of potatoes, chopped
2 6.5oz cans of clams (one only partially drained) 
2 c. cauliflower, chopped into florets
1/2 c. carrots, chopped
1/2 c. parsnips, peeled and chopped
1/3 c. red pepper, chopped
3/4 c. celery, chopped 
1/2 c. onion, chopped
3 bay leaves
1.5 tsp dried thyme
½ tbsp cornstarch 
Salt, to taste
Pepper, to taste
Red pepper flakes, to taste 

Chop all veggies. Coat bottom of large pot in cooking spray or thin layer of olive oil. Begin to saute onions, carrots, and parsnips over medium heat. Stir occasionally. Once these vegetables start to get slightly tender, add celery. After the celery begins to soften, add the red pepper. Continue to stir occasionally. 

Meanwhile, place chopped cauliflower in a microwave safe bowl with a few drops of water. Cover and steam until soft. Combine cauliflower and 1/4 c. half and half in food processor and blend until smooth. Once veggies are tender, turn heat down to medium-low and add broth, milk, cauliflower puree, bay leaves, and seasonings to the pot. Simmer, stirring occasionally, for 15 minutes. 


Add clams, chopped potatoes, and corn. Stir. Slowly add in cornstarch a little at a time, stirring thoroughly until combined. Add the remaining half and half. Simmer for at least 10 additional minutes. If desired, add more cornstarch for thickness and/or seasonings for flavor.

Sunday, February 3, 2013

Roasted Cauliflower Yogurt Dip and Homemade Tortilla Chips


With just four ingredients plus a handful of spices, this roasted cauliflower yogurt dip is so simple and quite healthy, yet tasty enough to impress a crowd. As I mentioned in my last post, I served this as an appetizer for Chicken Tikka Masala so I adjusted the seasonings a bit from the inspiration recipe to complement the flavors of my meal. Based on the fact that we were scrapping the last specks of the dip from bowl before the last guest even arrived, I'd say it was a success! 

I served with the world's simplest homemade tortilla chips which I've made three times again since! A few months ago, I was walking through Bed, Bath, and Beyond to purchase a birthday gift when one of those aisle stands meant to seduce vulnerable shoppers caught my eye... I fell into the trap and walked out of the store with a microwave chip maker. Luckily in this case, that $20 impulse purchase was totally worth it! I've used it to make potato chips, zucchini chips, apple chips, you name it. But tortilla chips may be my new favorite! All you do is use a pizza cutter to cut up a tortilla, place the pieces on the chip maker, microwave for one minute, flip, and put it back in for another 30 seconds. That's it! No oil, no spray, no nothing. They come out so crispy, I almost wouldn't believe it if I hadn't done it myself! Not to worry if you don't have one of these magic chip makers... you can also make baked tortilla chips in the oven. Or serve with pita chips, toasted bread, or raw veggies.


So, to make the dip, spray or lightly drizzle cauliflower with olive oil, season, and roast under high heat for at least 20 minutes until it starts to turn a nice brown color in some spots. After it's cooled a bit, blend in a food processor (or blender) with plain greek yogurt and lemon juice until smooth. Mix in additional seasonings and serve -- it's that easy! You'll need to season generously because both cauliflower and yogurt are rather plain on their own. Also, I found this dip tastes better when you take it out of the fridge for a while before serving so it can warm up a bit, but I didn't like it warmed in the microwave. Call me picky, but that's how it was best!


Going to a Super Bowl party tonight? This dip would certainly be a nice addition to the spread! But in case you're looking for even more inspiration, here's some recipes I've made in the past that you might consider. It's possible that one of these may end up being the topic of a future blog post, in which case you'll just have to pretend to be surprised ;) 

Homemade Dunkaroos


Roasted Cauliflower Yogurt Dip 

3/4 of a small/medium head of cauliflower
3/4 c yogurt
1 tbsp lemon juice
Olive oil
Cumin
Salt
Red pepper flakes
Curry powder
Garlic powder

Preheat oven to 450 degrees. Chop cauliflower into florets. Spray or lightly drizzle with olive oil. Sprinkle with salt, cumin, and red pepper flakes. Roast for 20 minutes. Remove and let cool slightly.

Mix cauliflower, yogurt, and lemon juice in food processor. Blend until smooth. Season with additional salt, red pepper flakes, cumin, curry powder, and garlic powder to taste.

Serve at room temperature.