Showing posts with label Entree. Show all posts

Sunday, April 28, 2013

Sushi!

Think sushi is something you can only enjoy on a special night out, prepared by a highly-trained sushi chef? Think again! You can make some simple rolls on your own at home for a sushi fix any night of the week!

Now is it authentic? I doubt it. Will you get crazier, more elaborate sushi at a fancy shmancy restaurant? Definitely. But this make-your-own sushi is simple, delicious, oh so easy to make, and sure to impress. All you need to do is pick up a few special ingredients and you're ready to go! 

First thing you need is nori sheets, which are the seaweed wrappers. I got mine at Fresh Market but I've seen them at Wegmans and other regular groceries stores as well. If you don't have any luck, an Asian specialty market is sure to have them. The next thing you need is the sticky rice. I got mine at Wegmans and a friend of mine found it at the local health food store. It's important, though, to get sticky rice or rice marked specifically for sushi; if you use regular rice, you'll have a tough time getting your rolls to stay together. Beyond that, you just need whatever you choose to put in your sushi. If you know of a store that sells sushi-grade raw fish, by all means go for it. If not, or if raw fish just isn't your thing, you can use cured salmon, often called lox. In addition, I also used cream cheese, avocado, cucumber, asparagus, and zucchini. Of course don't forget the soy sauce! And wasabi if that's your thing; I'm personally not a fan.


Actually making the sushi is simple. My nori package said to swipe the sheet over a hot burner several times until it turns bright green (be careful not to burn yourself!). This makes it pliable so you can roll your sushi without breaking the sheet. Then spread out your cooked sticky rice lengthwise in a line on the nori sheet (my sticky rice came precooked but if yours isn't, just follow the instructions on the package). Right alongside your rice, add the ingredients of your choosing in whatever combination you'd like. I chose to do avocado and cucumber, salmon and cream cheese, zucchini and asparagus (precooked), and salmon and avocado.

Now roll it all up and use a few drops of water to seal. Carefully use a sharp knife to slice the roll into pieces. I found that a serrated knife worked best for getting through the roll with all ingredients intact. And there you have it -- sushi at home! 


Make-Your-Own Sushi

No recipe for this one... Just get creative! 


Saturday, March 16, 2013

Roasted Eggplant with Tahini Yogurt Sauce and Crispy Chickpeas

Secret confession: When I made this dish, I scaled the proportions to what (according to the recipe) should have been two servings, assuming I'd have half for dinner and half for lunch the next day. Well I ate half of it... and then three-quarters... and finally just threw in the towel and devoured it all. It was that good. Plus hey, eggplant's good for you, right!? I did, however, have some of the tahini yogurt sauce leftover, which made a perfect dressing for a salad of spinach, tomatoes, cucumber, red pepper, onion, chickpeas, and feta (I just added in a tiny bit more water to it to thin it out). And I made extra crispy chickpeas which I used for a creative version of ants on a log: celery with garlic herb laughing cow cheese spread topped with crispy chickpeas.

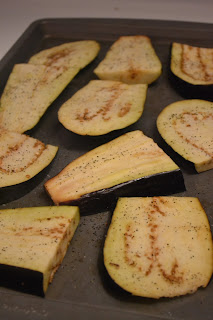
But on to the main attraction -- roasted eggplant with tahini yogurt sauce and crispy cumin chickpeas. Whenever I make eggplant, I cut it in the morning, sprinkle some salt on it and then press it in between paper towels while I'm at work. Supposedly this gets rid of any bitter taste the eggplant can have. Is it absolutely necessary? I'm not sure, but it's always resulted in delicious eggplant so I never want to risk it to find out what would happen if I didn't. In this case, the eggplant I had was quite large, so I cut in half and then sliced each half into slices about 3/4" thick.

When you're ready to start preparing the dish, the first thing you'll want to do is get your chickpeas in the oven to crisp up. If you only want enough chickpeas for the recipe, you can just do about 2/3 of the can, but these suckers are a delicious snack, so I'd recommend just doing the whole thing. Spray (or toss) generously with olive oil and then sprinkle on cumin, salt, and pepper. Roast for about 30-35 minutes at 425 degrees until nice and crispy.

As soon as you get the chickpeas in the oven, prep your eggplant. Spray the eggplant with olive oil (you shouldn't need anymore salt if you pre-pressed the eggplant) and pop that in the oven as well, roasting for 30 minutes, flipping once halfway through. 

While the chickpeas and eggplant are roasting, you can mix the sauce. Combine plain greek yogurt, tahini (which is sesame paste; most grocery stores carry it but if you can't find it check your local health food store), garlic, and lemon juice. Then slowly stir in water until the sauce is your desired consistency (you want it thick enough that you can dollop it on to the eggplant without it running off the sides). For me, this was about 1.5 tablespoons. 

After your eggplant is done roasting, top each slice with a generous amount of yogurt tahini sauce, several crispy chickpeas, and a sprinkle of parsley. Mmm mmm mmm... another winner inspired by the Smitten Kitchen cookbook! Consider making this amazing recipe as a vegetarian option for Lent or Meatless Monday or use it as a side dish if you want a heartier meal. 


Roasted Eggplant with Tahini Yogurt Sauce and Crispy Cumin Chickpeas
(Makes 1 large serving; 2-3 side dish servings)

1 large eggplant, halved and then cut into 3/4 inch slices
3/4 tsp garlic
1/4 c yogurt
1.5 tbsp tahini
1 tbsp lemon juice
1.5 tbsp water
2/3 can of chickpeas
Cumin
Salt and pepper, to taste
Olive oil
Parsley

Press salted eggplant slices in between paper towels for at least 20 minutes. Preheat oven to 425. Spray or toss chickpeas with olive oil and sprinkle with salt, pepper, and cumin. Roast approximately 30-35 minutes until crispy. 

Lightly spray or drizzle eggplant with olive oil. Roast for 25-30 minutes, flipping once halfway through. 

Mix yogurt, tahini, and lemon juice. Slowly add water until you've reached the desired consistency. 

Assemble by topping each eggplant slice with a dallop of tahini yogurt sauce, several chickpeas, and parsley. Sprinkle with salt and pepper if desired. 

Wednesday, March 6, 2013

Lime-Cilantro Shrimp and Couscous Foil Packets with Mango-Avocado Salsa


Guest Blogger: Camille Wingo


Janna has most graciously allowed me to do a guest post for Gourmet, My Way.  For anyone who doesn’t know me, I’m Janna’s roommate from Memphis, TN, so my favorite dishes typically come in casserole format and are covered in cheese. A few weeks ago, Janna blogged about hosting Bachelor Night, and this past week was my turn to host. Because of Janna’s newfound interest in seafood and another close friend’s lactose intolerance, I’ve decided to highlight my absolute favorite thing to make: Shrimp Pockets!  This is a recipe introduced at one of our Bachelor viewing parties several years ago by Lauren Dyer.  It was inspired by one in a Self Magazine e-newsletter, but has sense been tweaked and incorporated into everyone’s rotation of healthy and yummy dinner options.


Step One:  Marinate the shrimp.
Run the frozen shrimp under cold water to defrost.  Toss shrimp with olive oil, cilantro leaves, the juice of one lime, salt, and pepper to marinate.


Step Two: Assemble foil packets.
Combine 2 cups of dry couscous with 1 cup of water in a measuring cup and stir until it becomes a wet sand consistency.  Pull out about 18 inches of foil for each packet.  Take a LARGE handful of fresh spinach leaves and place in the middle of the foil packet.  Cover with 3/4 cup of the couscous/water mixture, and top with 1/4 of the marinated shrimp.  Roll up all four sides so that the foil packet is enclosed.  Repeat with other 3 foil packets and pop in the oven at 375 degrees.  Bake for 20-25 minutes until shrimp are all pink.  (Alternative cooking method: these foil packets can also be placed on the grill over medium-high heat for about 15-20 minutes until shrimp are fully-cooked.)


Step Three: Prepare the salsa.
While the foil packets are baking, chop the mango, red pepper, avocado, and red onion into small pieces.  Stir in the juice of one lime, remaining cilantro, and finely chopped jalapeno.  Add salt and pepper to taste.


Step Four: Enjoy.
Once the foil packets are ready, scrape the contents onto a plate (or eat directly from the foil packet for easy clean-up) and top with a plentiful amount of salsa.  Enjoy your delicious and healthy meal, have a glass of wine, and watch the newest episode of the Bachelor or the Bachelorette with a good group of friends!


Lime-Cilantro Shrimp and Couscous Foil Packets with Mango-Avocado Salsa
(makes 4 servings) 

1 pound frozen shrimp, shelled and deveined
1 bunch of fresh cilantro, divided into two parts
3 tablespoons olive oil
1 large mango, peeled and diced
2 medium ripe avocados, diced
½ red onion, diced
1/2 jalapeño pepper, seeded and finely chopped
2 limes
1 bag fresh baby spinach leaves
2 cups uncooked couscous
1 cup water
Salt and pepper
Lots of tin foil

Toss defrosted shrimp with olive oil, half the cilantro, juice of one lime, salt, and pepper to marinate. 

Mix uncooked couscous with water. Place large handful of fresh spinach in the middle of a piece of foil. Top with 3/4 c of couscous and 1/4 of the shrimp. Wrap foil so all sides are enclosed. Bake in 375 degree oven for 20-25 minutes until shrimp is cooked. 

Mix avocado, mango, red onion, jalapeno, juice of one lime, half the cilantro, and salt and pepper to taste. Top contents of the shrimp pocket with the avocado-mango salsa. 

Tuesday, February 26, 2013

Lemony Moroccan Quinoa with Lamb Sausage and Yogurt-Mint Sauce

Bold claim: this is probably my favorite recipe I've posted on this site to date. It may be because I'm secretly proud that I dreamed up an ethnic dish without any inspiration recipes; it may be because I was ravenously hungry when I made it; but I think it's just because it's really darn tasty!


As with a lot of my cooking, this dish was inspired by trying to think of a delicious way to prepare one particular ingredient I had on hand; in this case, lamb sausage. I like lamb but had never actually cooked it before. I could have taken the easy way out and just grilled it and served with some veggies, but I felt like a special ingredient deserved some special attention. So I came up with the idea of pairing it with dried apricots for that sweet/savory contrast I love so much. And from there the ideas just kept on flying... I'll serve over quinoa! With pistachios! And what kind of flavors? Lemon! And mint! And because I was concerned it might be a bit dry and I love yogurt oh so much, I'd top it all off with a yogurt sauce! It was a done deal; all I needed now was to hit up Trader Joe's for the ingredients.


Well, after about two hours of wandering like a kid and a candy store, I finally emerged from the TJ's black hole ready to make my dreams a reality. The dish came together quite easily; the hardest part is just timing it all so it's done at the same time. Here's the game plan I'd suggest:

Get your quinoa cooking on the stove first (just follow the instructions on the package). Then start chopping so you have everything ready to go: onions, spinach, mint, pistachios, and apricots. Next, spray the bottom of a skillet with olive oil or cooking spray and sauté your onions. When almost cooked, add the spinach. Meanwhile, put the lamb sausage on the grill. I used my Foreman, but if you don't have one and it's not outdoor grilling season (which unless I have any Florida readers, it's not...), you could also put it under the broiler or just cook it in a frying pan. No matter which method you choose, be careful not to overcook as lamb sausage can get dry and tough if cooked too long.


Once the quinoa is cooked, add the sautéed veggies, half the chopped mint, the pistachios and apricots, some lemon juice, cumin, allspice, and just a dash of salt. Fluff with a fork.

As your lamb finishes up, mix the yogurt sauce by combining yogurt, lemon  juice, the rest of the mint, and minced garlic. Serve the lamb sausage over the quinoa and top with the yogurt mint sauce. 

The dish really looks and tastes more complex than it is, making it a perfect choice for serving at a dinner party. Or keep this gem all to yourself an enjoy with a nice glass of wine - you deserve it!


Lemony Moroccan Quinoa with Lamb Sausage and Yogurt-Mint Sauce
(Makes approximately one dinner serving plus enough for lunch paired with a side) 

For the quinoa: 

3/4 c uncooked quinoa
20 pistachios, chopped
5 dried apricots, cut into small pieces
6 mint leaves, chopped finely
1/3 c onion, chopped
Handful of spinach, sliced into small strips
Salt and pepper to taste
1/4 tsp garlic powder
1/8 tsp all spice
1/4 tsp cumin
1.5 tbsp lemon juice
1 large or 2 small/medium links of lamb sausage (omit for a vegetarian dish)

For the yogurt sauce: 

1/4 c plain greek yogurt
6 mint leaves, chopped finely 
Salt and pepper to taste
1/2 tsp garlic powder
2 - 2.5 tsp lemon juice

Cook quinoa according to directions on package. In a separate pan, sauté chopped onions. When almost translucent, add spinach and cook until wilted. 

Grill lamb sausage until cooked all the way through. 

When quinoa is cooked, add in sautéed vegetables, pistachios, apricots, mint, spices, and lemon juice. Fluff with a fork. Top with sliced lamb sausage. 

Mix ingredients for yogurt sauce. Spoon on top of the lamb and quinoa. 

Wednesday, February 13, 2013

Grilled Ham with Rosemary Parsnip Puree


Just a quickie post for you today - grilled ham over rosemary parsnip puree. Or in reality, it's just a recipe for rosemary parsnip puree because the ham recipe is as follows: Grill. Eat. ;)

Anyway, this puree tastes rich, almost like it has quite a bit more butter in it than it actually does. I'm excited to try mixing some parsnips into mashed potatoes or mashed cauliflower to see if it adds that same flavor.

All you have to do is peel the parsnip and slice into pieces that are about 1/2" thick. Place in a covered dish and microwave for about three minutes until soft. Put the parsnips in a food processor with the milk and butter (or if you don't have a food processor, you could use a hand mixer or potato masher). Blend until smooth; you may choose to add more milk if you'd like a thinner texture like a more traditional puree but I liked it on the thicker, heartier side. Finally, mix in the spices, spread on the plate, and top with the grilled ham.


Grilled Ham with Rosemary Parsnip Puree

1 medium parsnip, peeled
1/4 - 1/2 tsp butter 
2 1/2 tbsp milk
1/4 tsp dried rosemary
1/4 tsp salt
1/4 tsp garlic powder

Slice parsnip into 1/2" slices and place in covered dish. Microwave for 3 minutes until soft. Put into food processor with milk and butter. Pulse until smooth. Add more milk if thinner texture is desired. Mix in spices. Spread on plate and top with grilled ham. 

Sunday, February 10, 2013

Creamy Pumpkin Sage Pasta


I know it's customary for pumpkin recipes to flood the Internet in October/November and all but disappear with the coming of the new year, but hey, I'm an equal opportunity pumpkin eater. I don't believe in relegating delicious food to only specific times of the year (hence the reason I enjoy a nice bowl of ice cream quite frequently in the middle of February...)

Back in the fall, I went pumpkin picking and found a lovely little pumpkin that I proceeded to use in about a hundred different ways. First, I had a pumpkin painting day with some family and friends. Then I used it as festive decoration in my apartment. Once it served it's purpose there, I decided to wash off the paint, chop it up, and roast. I used some of the roasted pumpkin for side dishes, seasoning it in a variety of ways. The rest, I puréed and froze for later use. With a hankering for a hearty meal and some chicken sausage that needed to be used up, I pulled out one of the frozen containers the other day and whipped up this creamy pumpkin sage pasta with chicken sausage and peas recipe. Don't be discouraged if you don't happen to have any frozen pumpkin puree in your freezer. You could buy a can of pumpkin puree (not pumpkin pie filling) or even better, roast a bunch of butternut squash and puree half to make this for dinner and save half to make this salad for lunch the next day!

The dish is extremely simple: cook pasta (any kind of rotini, ziti, etc. will do) until al dente; reserve a cup or so of the water before draining. Then, sauté chopped onions. Meanwhile, combine your puree and with cottage cheese in a food processor and blend until smooth. Don't worry if you aren't a fan of cottage cheese; this doesn't actually taste like it. That's just what gives the recipe the creaminess. Once the onions are cooked, turn down the burner to low and add the pumpkin mixture to the pot. Add all of your seasonings and stir. Add the pasta to the sauce and stir once again. Slowly add in some of the reserved pasta water, stirring frequently, to loosen the sauce a bit until you've achieved your desired consistency (all noodles should be coated). I ended up using about 1/4 c.

At this point, you have some customization choices. If you'd like to use this as a side, you can stop there and just top it off with some shredded parmesan cheese. However, I wanted to make a meal out of it so I sliced and heated a link of precooked chicken sausage (mine was Wegman's brand but I'm also a fan of Al Fresco and Trader Joe's) which I added to the pasta along with some frozen peas that I zapped in the microwave. If you don't care for peas, I'd assume chopped spinach or cauliflower would also work, but the pumpkin, sage, sausage, peas, and parmesan flavor combination is highly recommended... by yours truly! 

Before getting to the recipe, time for another quick restaurant review -- I recently lunched at Merzi in Penn Quarter and was really impressed by how good it was for being essentially a fast food joint. It's essentially an Indian version of Chipolte; the food is made-to-order as you progress down the line. You have your choice of meat (or can go vegetarian), veggies, warm sauces, and cold chutneys served as a naan roll, rice bowl, chaat (over chickpeas, onions, peppers, and potatoes), or salad. I got the lamb chaat with all the veggies, spicy masala, tamarind chutney, and yogurt sauce, and would definitely go back to try more. It's quick, healthy, delicious and cheap so fingers crossed they decide to open more locations in the future. Check it out and let me know what you think!


Creamy Pumpkin Sage Pasta with Chicken Sausage and Peas
(Makes approximately 2 hearty or 3 modest servings)


2 1/4 c uncooked pasta 
1 c pumpkin puree

1/4 c cottage cheese
1/2 TSP sage
1/4 TSP pepper
1/4 TSP nutmeg
1/2 TSP garlic
1/2 TSP kosher salt

1/2 c frozen peas, microwaved according to package
1/4 c chopped onion 
Parmesan cheese
Chicken sausage

Cook the pasta in a pot of salted boiling water until al dente. Reserve a cup of the pasta water and drain. 


Meanwhile, combine pumpkin puree and cottage cheese in a food processor and blend until smooth. Saute onion over medium heat in a sauce pan until nearly translucent. Turn heat down to low. After a minute or so, add pumpkin sauce and spices and stir. Add cooked pasta and peas, stirring again. Slowly add in the reserved pasta water until you reach your desired consistency for the sauce. Serve topped with cooked chicken sausage and parmesan cheese. 

Thursday, January 31, 2013

Chicken Tikka Masala

I have a confession to make... I watch The Bachelor. In my defense, I spend about 95% of the time making fun of the people who are on the show, but regardless I know I may have just lost some respect points with some of you. This is a consequence I'm willing to accept.

Every Monday night, I get together with a group of really awesome girls (and one guy who shall now and forever remain nameless for the sake of his manhood) to view this riveting two-hours of television. We take turns hosting and making dinner, and this week was my turn! 

I figured the best way to feed a large group was with a crock pot meal, so I decided to go with one that had been on my "Recipes to Make" pinboard for quite some time... Chicken Tikka Masala! I must admit, as much as I love Indian food, I've only dabbled with cooking it myself a few times as the list of ingredients usually totally intimidates me, but this recipe from LaLoosh looked totally manageable and so I followed it pretty closely. The main changes I made were that I increased the proportions by 2.5x to make enough for all my guests, used ginger powder because I didn't have any fresh ginger, and, because I was short one jalapeno and I me love some spice, I left the seeds/membranes on one of them for some extra kick. I also made extra brown rice and served with a dollop of plain greek yogurt. 

The night before, I chopped all the veggies and mixed everything but the chicken so it'd be ready to go in the morning. As you can see, things got a little crazy that night in the kitchen... (I was also prepping the appetizer -- roasted cauliflower yogurt dip with homemade tortilla chips, which I'll be sharing with you in a future post -- and created a recipe for a giant pot of soup I used for my lunches for the week, which I'll also be blogging about soon!) 

Th
e next morning, I put the chicken in the crock pot, topped with the veggie mixture, and turned it on low. I checked it after four hours and because there was SO much in the crock pot, it wasn't really cooking yet. So I cranked it up to high for the next 2 hrs and 15 minutes. When I came back to check it again, I found it had overflowed (oops!) but was definitely getting good and tender. However, I needed to add some extra salt and because it seemed a bit too liquidy though, I broke up the chicken to absorb some of the flavor and mixed in some cornstarch to thicken the sauce. At this point, I turned it down to low and cooked for another hour and 45 minutes. Now, it's not necessary for you to follow these exact times, but I would suggest checking on it at some point before you intend on serving to break up the chicken into smaller pieces and see if you should add cornstarch. The original recipe suggests 6-8 hours on low or 4 on high for 4 servings so the times will really depend on how much you make. 


As the apartment now smelled overwhelmingly like an Indian restaurant, we were eager to dig in! However, if you're more patient than we were, it's probably best if you let it rest a little. Scoop your Chicken Tikka Masala on top of some brown rice and top with cilantro and greek yogurt. And there you have it -- Indian food made easy! 

The bachelor gang ready to dig in!

Crock Pot Chicken Tikka Masala
(makes approximately 8 servings) 


23oz boneless, skinless chicken breasts
3 - 3 1/2 cups brown rice, uncooked
2 large sweet onions, thinly sliced
8-10 garlic cloves, minced
4 jalapenos (3 seeded)
2 28oz can and 2/3 of a 14oz can of diced tomatoes 
1 1/4 cup plain, non-fat Greek yogurt, plus additional for topping
1 tsp freshly grated ginger
2 1/2 tbsp Garam Masala
2 1/2 tbsp cumin
2 1/2 tsp paprika
2 1/2 tsp allspice
1 1/4 tbsp salt 
1 1/2 tsp black pepper
5 tbsp lime juice (or the juice of 2-3 fresh limes) 
2 tbsp of cornstarch, if necessary 
Fresh cilantro to taste

Mix onions, garlic, jalapenos, tomatoes, greek yogurt, spices (except cilantro), and lime juice in a large bowl. 


Cut chicken into strips and place in the bottom of the crock pot. Top with vegetable mixture. 

Cook on high for 2 hours. Turn to low and cook for another approximately 6 hours. With 2 hours left, break chicken into smaller pieces and stir. If too liquidy, slowly mix in cornstarch. 

Cook rice according to the directions on the package. Scoop the chicken mixture on top of rice, top with fresh cilantro and greek yogurt to serve. 


Sunday, January 27, 2013

"Healthified" Chicken Fingers and Fries (with Garlic Mayo Aioli)

One of my favorite things to do when I cook is come up with sneaky little ways to make recipes healthier and more nutritious. This can mean adding in some cauliflower puree to mashed potatoes, using cottage cheese to create an alfredo sauce, making ice cream out of frozen bananas, or adding black bean puree to brownies (though I'll admit, that last one turned out pretty gross and I'm still in search of a tasty black bean brownie recipe so please share if you have one!). I get a weird satisfaction out of revealing the "secret" of these recipes to unsuspecting eaters. Although this particular recipe isn't as "out there" as some of the ones I've made in the past, I figured it was best to ease you guys into things... 


A few days ago, I had a craving for chicken fingers and so I decided to make a "healthified" version of the basic comfort meal of chicken fingers and fries. The chicken fingers are baked rather than fried, and the "fries" are actually parsnips! I don't know about you, but I hadn't previously eaten parsnips very often; in fact, I'm not sure I ever actually purchased one before. But sliced in the shape of a fry and baked in the oven under high heat, these babies were soft on the inside and slightly crispy on the outside, making them a great swap for potatoes with added nutrition. 

The key to the chicken fingers was to soak them in buttermilk. This makes them incredibly moist inside. I used dry buttermilk mix because it's easier than trying to use up a whole thing of buttermilk before it spoils. I cut the chicken into tender-sized pieces in the morning and let them soak in the buttermilk while I was at work. Because I'm indecisive, I decided to make two different kinds of chicken fingers. Both were breaded in panko (breadcrumbs would work too if you don't have any panko), but for half of them, I mixed in grated parmesan cheese and a variety of other seasonings to create an Italian flavor profile. For the other half, I mixed in shredded coconut and some spices for a "sweet and spicy" taste. 

After soaking the chicken, you'll dip each piece into the panko and spices mix
So many spices!
and place on a sprayed cookie sheet. Spray the chicken with olive oil using a Misto (or if you don't have one, just lightly drizzle it with olive oil or in a real pinch, spray with cooking spray; you need something on it though or it won't get crispy). Put into an oven preheated for 425 degrees. When the
Ready to take out of the oven
breading starts to get light brown and crispy, flip the chicken over and put it back into the over. Remove
when the other side is brown as well. I ended up baking them 7 minutes on the first side and 9 minutes on the other, but it will depend on the size of your tenders. To be safe, you can cut into one to make sure there's no pink inside. 


For the "fries," peel the parsnips and cut into the shape of fries, approximately four inches in length. Try your best to make them equal in size, especially in width. Because of the shape of my parsnips, some were thick on top and thin on the bottom, so they didn't all cook evenly. Next time, I'd shave more off of them
Here's what they look like when done
to make them uniform. You could always save any leftover pieces that don't make good fries to cook and puree or just eat raw. Anyway, place onto a sprayed cookie sheet and spray or lightly toss with olive oil. I used this recipe as a guide, so I seasoned mine with rosemary, garlic, cumin, salt and pepper, but if you don't care for those flavors, season as you please! I baked these for about 16 minutes until they started to brown on all sides, flipping them halfway through, but again, exactly cooking size will vary based on the size of your fries. Because I wanted to save time, I started these at 450 for a few minutes but then cheated and cooked them the rest of the way at 425 so I could put the chicken in at the same time, but if you're making them on their own, you'll want to stick to the higher heat so they get crispier.


I am a condiment fiend, so I served my chicken fingers and fries with ketchup, BBQ sauce, a coconut mango sauce, and a garlic mayo aioli. While many people find it revolting, I adore fries dipped in mayo, so personally, the aioli was my favorite sauce for the parsnips. I also preferred the ketchup with the Italian chicken fingers and the BBQ sauce with the coconut chicken. If you try the recipe, let me know your favorites! The recipes below make enough for 2 large or 3 moderate portions.


Baked Chicken Fingers

12-14 oz. boneless, skinless chicken breast
1 c. of buttermilk
Olive oil spray

For Italian seasoning: 
1/4 heaping c. panko
1 tbsp grated parmesean
Garlic powder, onion powder, red pepper flakes, parsley, oregano, salt, pepper to taste

For Coconut chicken: 
1/4 heaping c. panko
1 tbsp shredded coconut 
Garlic powder, chili powder, ginger, salt, red pepper flakes to taste

Cut the chicken breast into tender-sized pieces, approximately 1" x 4". Soak chicken tenders in buttermilk for at least an hour.  

Preheat oven to 425 degrees. Mix the panko and Italian spices in one bowl and the panko and coconut spices in another. If you choose to do all one type of chicken tender, double the measurements. 

Remove chicken from buttermilk and roll in the breading. Place onto a sprayed cookie sheet. Spray the chicken with olive oil. Place in the oven and bake for approximately 8 minutes. Flip and place back in the oven for another 8 minutes or until the chicken is light brown and crispy on both sides. 


Parsnip Fries   

5 parsnips, peeled
Olive oil spray
1.5-2 tbsp dried rosemary
Garlic powder, cumin, salt and pepper to taste 

Preheat the oven to 450 degrees. Chop the parsnips into the shape of fries, approximately 1/2" x 4" and place on sprayed cookie sheet. Spray with olive oil and sprinkle with spices. Bake for approximately 8 minutes, flip, and bake for another 8 minutes until they begin to brown. 


Garlic Mayo Aioli 
2 tbsp light mayo (don't use fat free) 
1 tsp lemon juice
Hefty sprinkle of garlic powder (or you can sub minced garlic)
Salt and pepper to taste

Mix and enjoy!

Friday, January 25, 2013

Eggs Poached in Tomato Sauce

It's 6:30pm, and you're just getting out of work. In between checking your cell phone and figuring out when the next metro's coming, your stomach growls. Crap... you didn't get anything out for dinner, and by the sound of that growl, waiting for something to thaw or making a trip to the grocery store is just not an option. You're about to succumb to the temptation of Chipolte when you remember the latest Gourmet, My Way post. Let me introduce you to your new go-to dinner in a pinch: eggs poached in tomato sauce. It may not sound all that glamorous, but it's definitely delicious. This recipe is simple but hearty, and because it's quite adaptable, you're likely to have all the ingredients already on hand. 


Poached eggs are one of my favorite kinds of eggs. My mom used to make them for me whenever I was sick and mix them with cut up pieces of toast, so it's somewhat of a nostalgic food for me. These days, I enjoy them in a nice eggs benedict, atop a spinach salad, or... poached in tomato sauce! Start out by sauteing some onions and red pepper (or other veggies could work, too) over medium heat until tender. Turn down the heat to medium-low and add in enough tomato sauce to cover the bottom of the pot. I used a basic marinara pasta sauce, but tomato puree or a can of diced tomatoes would work as well. Spice it up with some garlic powder, onion powder, parsley, oregano, red pepper flakes, salt, and pepper. Now carefully crack your eggs directly on top of the sauce so that the eggs remain intact and cover. 


While the eggs are cooking, you can prep the rest of your meal. You'll definitely want some toasted bread for dipping. I went with a multigrain bagel -- Wegman's in-store bakery ones are great -- but a crusty slice of bread or a pita would work just as well. I also sauteed some zucchini as a side. Cook until the egg whites are no longer liquid, but be careful not to overcook -- you want the egg yolks to still be runny. (As a guide, they're getting close to being done in the photo above on the right.) To serve, scoop the contents of the pot into a bowl and top with some parmesan cheese (which will get all melty and delicious!) and another few shakes of your spices if you please. 


And there you have it, folks. A well-rounded, homemade meal in minutes. Enjoy!


Eggs Poached in Tomato Sauce

2 eggs
1/4 c. chopped onion
1/4 c. chopped red pepper
2/3 c. tomato sauce
Shredded parmesan cheese 
Sprinkle of: garlic powder, onion powder, parsley, oregano, red pepper flakes, salt & pepper


Coat the bottom of a small sauce pan with cooking spray or a light drizzle of olive oil. Cook the vegetables over medium-high heat until onions begin to become translucent.

Turn heat down to medium-low. Pour enough tomato sauce into the pot to completely cover the bottom (amount will depend on the size of your pot). Season your sauce to taste and stir.

Once sauce is begins to bubble slightly, crack eggs directly on top of the sauce and cover. Eggs are done cooking when whites are no longer liquid but yolk is still runny inside.

Remove from heat, top with cheese and more seasoning as needed. Serve with bread.