Wednesday, February 6, 2013

New England Clam Chowda

Believe it or not, just a year ago I didn't eat any seafood. Shrimp, fish, scallops, crab... I wouldn't touch it. I ate some seafood as a child -- fish or tuna noodle casserole -- but one day I just decided it was gross and never looked back. Fast forward fifteen years, and I found myself living in the Chesapeake Bay-area and, as a non-seafood eater, I felt like a fish out of water (sorry, pun intended...). About a year ago, I finally convinced myself that as someone loves all other kinds of food, I had no reason to let fear stand in the way of enjoying an entire genre of food, and I needed to give it a go. I slowly tasted a few things here and there, and then about six months ago, decided to throw caution to the wind and start testing out seafood whenever I had the chance. That was one of the best decisions I've ever made. 

I haven't gotten around to trying absolutely everything yet, but crab cakes, tilapia, shrimp, sea bass, scallops, smoked salmon... I love it all! So back in October, while on a girls weekend getaway in New England, I tried a lobster roll and bowl of New England clam chowder, and ever since, I've been wanting to make my own. Well, lobster is quite expensive, but I recently decided to give the clam chowder a whirl!

I'm not sure why I thought that one experience with clam chowder qualified me as enough of an expert to not follow a recipe, but I was determined to create my own recipe! I knew what I wanted -- I wanted it to be light enough that a bowlful didn't make you feel overstuffed but still creamy like a New England clam chowder should be. I wanted it to be easy (AKA I wasn't dealing with live clams). And I wanted it to be full of veggies. Now, a true stickler from New England with very specific criteria for their chowda might not approve of this recipe, but I definitely enjoyed it and I served it to a born-and-raised Mainer who helped herself to seconds so that's good enough for me! 

I started by chopping and sauteing onions, carrots, and parsnips in a gigantic pot. After a few minutes, I added some celery, and after a few more minutes, red pepper. Meanwhile, I chopped cauliflower into florets and steamed it in the microwave until soft. I blended the cauliflower with some fat free half and half in a food processor to create a puree that would help thicken the soup. 

Once the veggies were getting tender (but not mushy), I added in the broth (I used chicken broth because I didn't have any vegetable), milk, and cauliflower puree as well as bay leaves, thyme, salt, pepper, and red pepper flakes to taste. I let this simmer on low heat, stirring occasionally, for about 15 minutes. It wasn't quite as thick as I wanted, so I added in additional half and half and some cornstarch to thicken it up. At this point, I also added in a small can of corn (drained), a can of potatoes chopped into small cubes, and two small cans of clams (one of which I totally drained and one that I left most of the liquid in for additional flavor). 
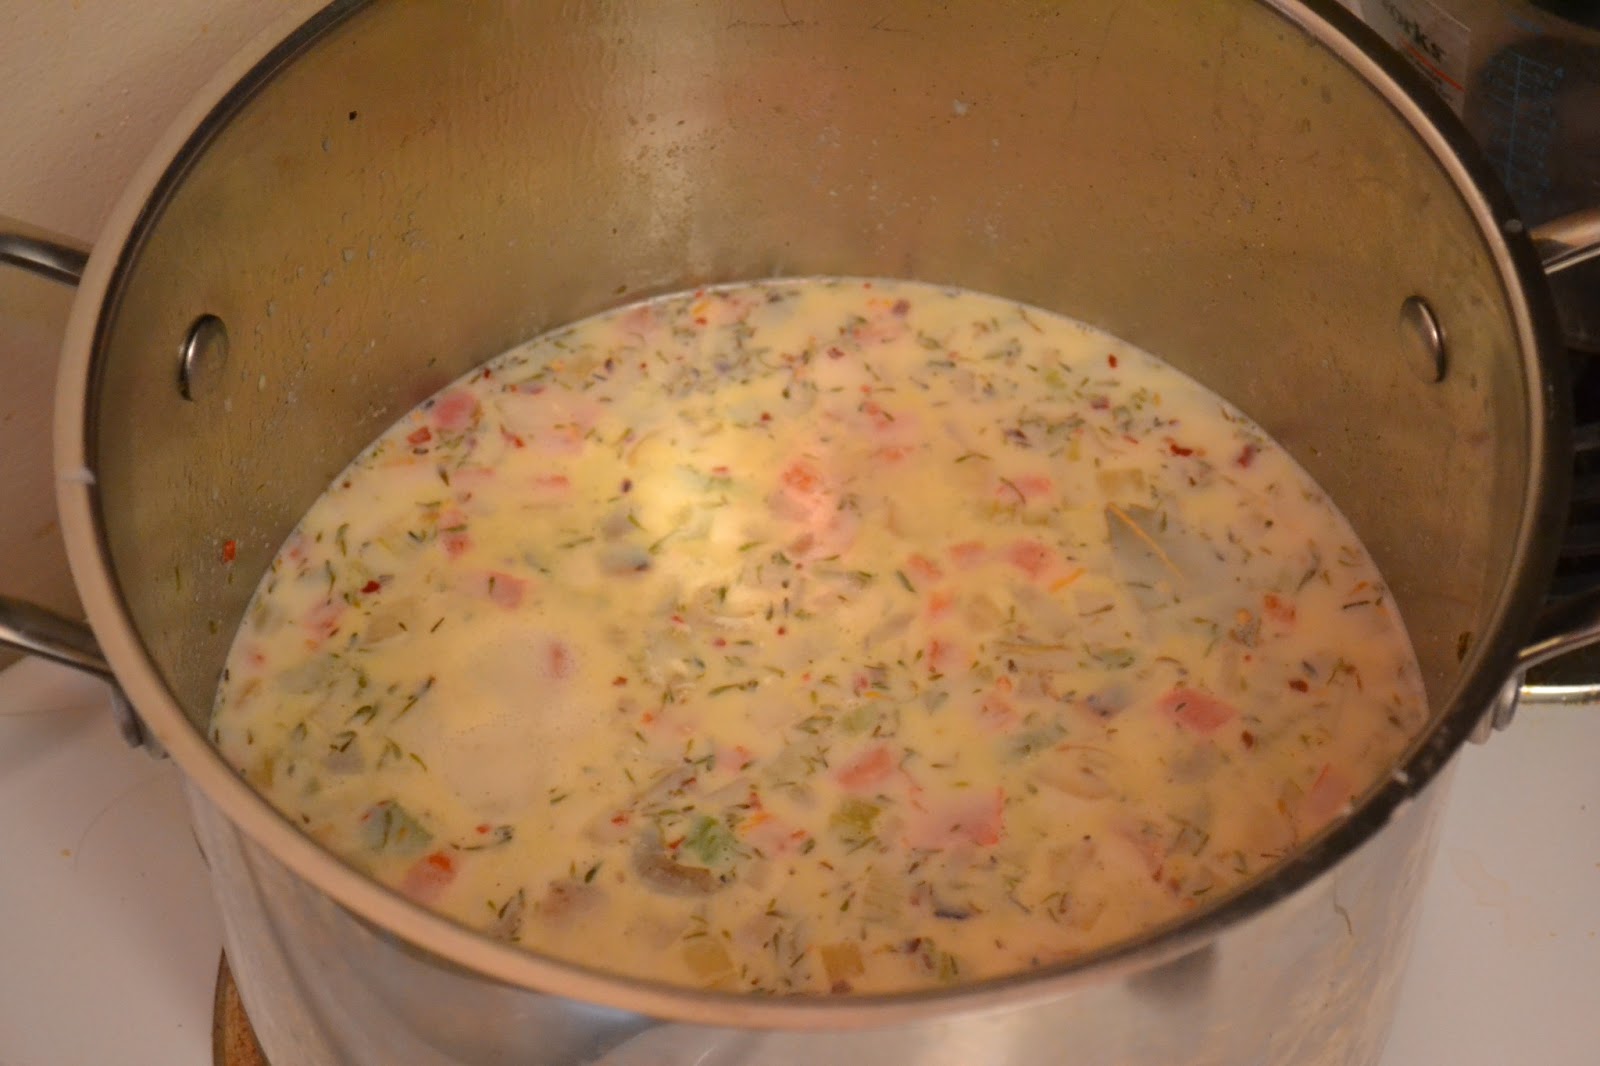
Continue to let the soup simmer as you stir occasionally for at least another 10 minutes or so. Taste test to judge if you want to add additional salt, pepper, or red pepper flakes or if it needs any more cornstarch to thicken. (Tip: when adding cornstarch, do so slowly and with a whisk so you don't get lumps in your soup.) 

Some notes: you don't need to use all of the vegetables I used if you don't have them. Whatever you like will work! Also, if you want to cook your own potatoes rather than using ones from a can, you can add them as soon as you add the liquid to the pot and cook them in the broth. If you're feeling really adventurous and want to use fresh clams, more power to ya! You'll have to google a recipe though, because that's one thing I still haven't attempted... 

I intended on using some turkey bacon in this recipe as well but simply forgot, so I cooked a piece afterward and sprinkled it on top, but I have to say, I didn't really like it. I also added some hot sauce to see how that would taste but didn't care much for that either. I liked this best plain and simple, with just some crackers or toasty bread for dipping and a salad on the side. Hope you enjoy this chowder as much as I'm enjoying exploring the wide world of seafood!


Round two of many on the Lazy Susan 

Speaking of seafood... I mentioned in the introductory post that I'd also occasionally blog about reviews of restaurants and products. Well I recently took a trip out to Falls Church, Virginia to Fortune Seafood for their weekend dim sum brunch and wanted to report back. (Apologies to those who don't live near DC as my restaurant reviews will almost exclusively be from this area, but that will just give everyone even more reason to come and visit!). For those who have never been, dim sum is more than a meal; it's an experience. As soon as you sit down, you are swarmed by carts of 
dumplings, rolls, noodle dishes, buns, etc. The servers buzz around the room at the speed of light, offering you their delicacies with little explanation of what you'll be eating. If you accept, they stamp your table's card to keep track of what you've purchased, hand you the food, and are off to the next table before you can blink an eye. It can be a bit overwhelming, but it is definitely delicious, fun, and adventurous! If you haven't been, I highly suggest it, and Fortune is a great place to start. Yes, Falls Church is a trek, but it's worth it if you want the authentic dim sum experience that you just can't find in the city. Don't expect anything fancy or particularly charming but do expect to leave super full and satisfied for a very reasonable price. That being said, I don't suggest going if you have a lot of dietary restrictions or aren't a huge seafood fan -- many of the dishes are from under the sea. My favorite dish was the banana shrimp rolls, but the bok choy, coconut mango buns, and crab meatballs were also memorable. If you head out the Fortune, leave a comment letting me know what you think! 


New England Clam Chowder


3 cups 1% milk 
3 cups chicken or vegetable broth
1/2 c. fat free half and half, divided
8 oz can of corn, drained 
15oz can of potatoes, chopped
2 6.5oz cans of clams (one only partially drained) 
2 c. cauliflower, chopped into florets
1/2 c. carrots, chopped
1/2 c. parsnips, peeled and chopped
1/3 c. red pepper, chopped
3/4 c. celery, chopped 
1/2 c. onion, chopped
3 bay leaves
1.5 tsp dried thyme
½ tbsp cornstarch 
Salt, to taste
Pepper, to taste
Red pepper flakes, to taste 

Chop all veggies. Coat bottom of large pot in cooking spray or thin layer of olive oil. Begin to saute onions, carrots, and parsnips over medium heat. Stir occasionally. Once these vegetables start to get slightly tender, add celery. After the celery begins to soften, add the red pepper. Continue to stir occasionally. 

Meanwhile, place chopped cauliflower in a microwave safe bowl with a few drops of water. Cover and steam until soft. Combine cauliflower and 1/4 c. half and half in food processor and blend until smooth. Once veggies are tender, turn heat down to medium-low and add broth, milk, cauliflower puree, bay leaves, and seasonings to the pot. Simmer, stirring occasionally, for 15 minutes. 


Add clams, chopped potatoes, and corn. Stir. Slowly add in cornstarch a little at a time, stirring thoroughly until combined. Add the remaining half and half. Simmer for at least 10 additional minutes. If desired, add more cornstarch for thickness and/or seasonings for flavor.

Sunday, February 3, 2013

Roasted Cauliflower Yogurt Dip and Homemade Tortilla Chips


With just four ingredients plus a handful of spices, this roasted cauliflower yogurt dip is so simple and quite healthy, yet tasty enough to impress a crowd. As I mentioned in my last post, I served this as an appetizer for Chicken Tikka Masala so I adjusted the seasonings a bit from the inspiration recipe to complement the flavors of my meal. Based on the fact that we were scrapping the last specks of the dip from bowl before the last guest even arrived, I'd say it was a success! 

I served with the world's simplest homemade tortilla chips which I've made three times again since! A few months ago, I was walking through Bed, Bath, and Beyond to purchase a birthday gift when one of those aisle stands meant to seduce vulnerable shoppers caught my eye... I fell into the trap and walked out of the store with a microwave chip maker. Luckily in this case, that $20 impulse purchase was totally worth it! I've used it to make potato chips, zucchini chips, apple chips, you name it. But tortilla chips may be my new favorite! All you do is use a pizza cutter to cut up a tortilla, place the pieces on the chip maker, microwave for one minute, flip, and put it back in for another 30 seconds. That's it! No oil, no spray, no nothing. They come out so crispy, I almost wouldn't believe it if I hadn't done it myself! Not to worry if you don't have one of these magic chip makers... you can also make baked tortilla chips in the oven. Or serve with pita chips, toasted bread, or raw veggies.


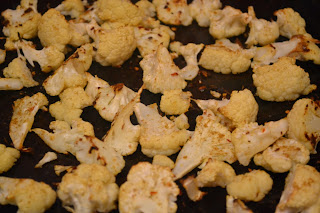
So, to make the dip, spray or lightly drizzle cauliflower with olive oil, season, and roast under high heat for at least 20 minutes until it starts to turn a nice brown color in some spots. After it's cooled a bit, blend in a food processor (or blender) with plain greek yogurt and lemon juice until smooth. Mix in additional seasonings and serve -- it's that easy! You'll need to season generously because both cauliflower and yogurt are rather plain on their own. Also, I found this dip tastes better when you take it out of the fridge for a while before serving so it can warm up a bit, but I didn't like it warmed in the microwave. Call me picky, but that's how it was best!


Going to a Super Bowl party tonight? This dip would certainly be a nice addition to the spread! But in case you're looking for even more inspiration, here's some recipes I've made in the past that you might consider. It's possible that one of these may end up being the topic of a future blog post, in which case you'll just have to pretend to be surprised ;) 

Homemade Dunkaroos


Roasted Cauliflower Yogurt Dip 

3/4 of a small/medium head of cauliflower
3/4 c yogurt
1 tbsp lemon juice
Olive oil
Cumin
Salt
Red pepper flakes
Curry powder
Garlic powder

Preheat oven to 450 degrees. Chop cauliflower into florets. Spray or lightly drizzle with olive oil. Sprinkle with salt, cumin, and red pepper flakes. Roast for 20 minutes. Remove and let cool slightly.

Mix cauliflower, yogurt, and lemon juice in food processor. Blend until smooth. Season with additional salt, red pepper flakes, cumin, curry powder, and garlic powder to taste.

Serve at room temperature.

Thursday, January 31, 2013

Chicken Tikka Masala

I have a confession to make... I watch The Bachelor. In my defense, I spend about 95% of the time making fun of the people who are on the show, but regardless I know I may have just lost some respect points with some of you. This is a consequence I'm willing to accept.

Every Monday night, I get together with a group of really awesome girls (and one guy who shall now and forever remain nameless for the sake of his manhood) to view this riveting two-hours of television. We take turns hosting and making dinner, and this week was my turn! 

I figured the best way to feed a large group was with a crock pot meal, so I decided to go with one that had been on my "Recipes to Make" pinboard for quite some time... Chicken Tikka Masala! I must admit, as much as I love Indian food, I've only dabbled with cooking it myself a few times as the list of ingredients usually totally intimidates me, but this recipe from LaLoosh looked totally manageable and so I followed it pretty closely. The main changes I made were that I increased the proportions by 2.5x to make enough for all my guests, used ginger powder because I didn't have any fresh ginger, and, because I was short one jalapeno and I me love some spice, I left the seeds/membranes on one of them for some extra kick. I also made extra brown rice and served with a dollop of plain greek yogurt. 

The night before, I chopped all the veggies and mixed everything but the chicken so it'd be ready to go in the morning. As you can see, things got a little crazy that night in the kitchen... (I was also prepping the appetizer -- roasted cauliflower yogurt dip with homemade tortilla chips, which I'll be sharing with you in a future post -- and created a recipe for a giant pot of soup I used for my lunches for the week, which I'll also be blogging about soon!) 

Th
e next morning, I put the chicken in the crock pot, topped with the veggie mixture, and turned it on low. I checked it after four hours and because there was SO much in the crock pot, it wasn't really cooking yet. So I cranked it up to high for the next 2 hrs and 15 minutes. When I came back to check it again, I found it had overflowed (oops!) but was definitely getting good and tender. However, I needed to add some extra salt and because it seemed a bit too liquidy though, I broke up the chicken to absorb some of the flavor and mixed in some cornstarch to thicken the sauce. At this point, I turned it down to low and cooked for another hour and 45 minutes. Now, it's not necessary for you to follow these exact times, but I would suggest checking on it at some point before you intend on serving to break up the chicken into smaller pieces and see if you should add cornstarch. The original recipe suggests 6-8 hours on low or 4 on high for 4 servings so the times will really depend on how much you make. 


As the apartment now smelled overwhelmingly like an Indian restaurant, we were eager to dig in! However, if you're more patient than we were, it's probably best if you let it rest a little. Scoop your Chicken Tikka Masala on top of some brown rice and top with cilantro and greek yogurt. And there you have it -- Indian food made easy! 

The bachelor gang ready to dig in!

Crock Pot Chicken Tikka Masala
(makes approximately 8 servings) 


23oz boneless, skinless chicken breasts
3 - 3 1/2 cups brown rice, uncooked
2 large sweet onions, thinly sliced
8-10 garlic cloves, minced
4 jalapenos (3 seeded)
2 28oz can and 2/3 of a 14oz can of diced tomatoes 
1 1/4 cup plain, non-fat Greek yogurt, plus additional for topping
1 tsp freshly grated ginger
2 1/2 tbsp Garam Masala
2 1/2 tbsp cumin
2 1/2 tsp paprika
2 1/2 tsp allspice
1 1/4 tbsp salt 
1 1/2 tsp black pepper
5 tbsp lime juice (or the juice of 2-3 fresh limes) 
2 tbsp of cornstarch, if necessary 
Fresh cilantro to taste

Mix onions, garlic, jalapenos, tomatoes, greek yogurt, spices (except cilantro), and lime juice in a large bowl. 


Cut chicken into strips and place in the bottom of the crock pot. Top with vegetable mixture. 

Cook on high for 2 hours. Turn to low and cook for another approximately 6 hours. With 2 hours left, break chicken into smaller pieces and stir. If too liquidy, slowly mix in cornstarch. 

Cook rice according to the directions on the package. Scoop the chicken mixture on top of rice, top with fresh cilantro and greek yogurt to serve. 


Sunday, January 27, 2013

"Healthified" Chicken Fingers and Fries (with Garlic Mayo Aioli)

One of my favorite things to do when I cook is come up with sneaky little ways to make recipes healthier and more nutritious. This can mean adding in some cauliflower puree to mashed potatoes, using cottage cheese to create an alfredo sauce, making ice cream out of frozen bananas, or adding black bean puree to brownies (though I'll admit, that last one turned out pretty gross and I'm still in search of a tasty black bean brownie recipe so please share if you have one!). I get a weird satisfaction out of revealing the "secret" of these recipes to unsuspecting eaters. Although this particular recipe isn't as "out there" as some of the ones I've made in the past, I figured it was best to ease you guys into things... 


A few days ago, I had a craving for chicken fingers and so I decided to make a "healthified" version of the basic comfort meal of chicken fingers and fries. The chicken fingers are baked rather than fried, and the "fries" are actually parsnips! I don't know about you, but I hadn't previously eaten parsnips very often; in fact, I'm not sure I ever actually purchased one before. But sliced in the shape of a fry and baked in the oven under high heat, these babies were soft on the inside and slightly crispy on the outside, making them a great swap for potatoes with added nutrition. 

The key to the chicken fingers was to soak them in buttermilk. This makes them incredibly moist inside. I used dry buttermilk mix because it's easier than trying to use up a whole thing of buttermilk before it spoils. I cut the chicken into tender-sized pieces in the morning and let them soak in the buttermilk while I was at work. Because I'm indecisive, I decided to make two different kinds of chicken fingers. Both were breaded in panko (breadcrumbs would work too if you don't have any panko), but for half of them, I mixed in grated parmesan cheese and a variety of other seasonings to create an Italian flavor profile. For the other half, I mixed in shredded coconut and some spices for a "sweet and spicy" taste. 

After soaking the chicken, you'll dip each piece into the panko and spices mix
So many spices!
and place on a sprayed cookie sheet. Spray the chicken with olive oil using a Misto (or if you don't have one, just lightly drizzle it with olive oil or in a real pinch, spray with cooking spray; you need something on it though or it won't get crispy). Put into an oven preheated for 425 degrees. When the
Ready to take out of the oven
breading starts to get light brown and crispy, flip the chicken over and put it back into the over. Remove
when the other side is brown as well. I ended up baking them 7 minutes on the first side and 9 minutes on the other, but it will depend on the size of your tenders. To be safe, you can cut into one to make sure there's no pink inside. 


For the "fries," peel the parsnips and cut into the shape of fries, approximately four inches in length. Try your best to make them equal in size, especially in width. Because of the shape of my parsnips, some were thick on top and thin on the bottom, so they didn't all cook evenly. Next time, I'd shave more off of them
Here's what they look like when done
to make them uniform. You could always save any leftover pieces that don't make good fries to cook and puree or just eat raw. Anyway, place onto a sprayed cookie sheet and spray or lightly toss with olive oil. I used this recipe as a guide, so I seasoned mine with rosemary, garlic, cumin, salt and pepper, but if you don't care for those flavors, season as you please! I baked these for about 16 minutes until they started to brown on all sides, flipping them halfway through, but again, exactly cooking size will vary based on the size of your fries. Because I wanted to save time, I started these at 450 for a few minutes but then cheated and cooked them the rest of the way at 425 so I could put the chicken in at the same time, but if you're making them on their own, you'll want to stick to the higher heat so they get crispier.


I am a condiment fiend, so I served my chicken fingers and fries with ketchup, BBQ sauce, a coconut mango sauce, and a garlic mayo aioli. While many people find it revolting, I adore fries dipped in mayo, so personally, the aioli was my favorite sauce for the parsnips. I also preferred the ketchup with the Italian chicken fingers and the BBQ sauce with the coconut chicken. If you try the recipe, let me know your favorites! The recipes below make enough for 2 large or 3 moderate portions.


Baked Chicken Fingers

12-14 oz. boneless, skinless chicken breast
1 c. of buttermilk
Olive oil spray

For Italian seasoning: 
1/4 heaping c. panko
1 tbsp grated parmesean
Garlic powder, onion powder, red pepper flakes, parsley, oregano, salt, pepper to taste

For Coconut chicken: 
1/4 heaping c. panko
1 tbsp shredded coconut 
Garlic powder, chili powder, ginger, salt, red pepper flakes to taste

Cut the chicken breast into tender-sized pieces, approximately 1" x 4". Soak chicken tenders in buttermilk for at least an hour.  

Preheat oven to 425 degrees. Mix the panko and Italian spices in one bowl and the panko and coconut spices in another. If you choose to do all one type of chicken tender, double the measurements. 

Remove chicken from buttermilk and roll in the breading. Place onto a sprayed cookie sheet. Spray the chicken with olive oil. Place in the oven and bake for approximately 8 minutes. Flip and place back in the oven for another 8 minutes or until the chicken is light brown and crispy on both sides. 


Parsnip Fries   

5 parsnips, peeled
Olive oil spray
1.5-2 tbsp dried rosemary
Garlic powder, cumin, salt and pepper to taste 

Preheat the oven to 450 degrees. Chop the parsnips into the shape of fries, approximately 1/2" x 4" and place on sprayed cookie sheet. Spray with olive oil and sprinkle with spices. Bake for approximately 8 minutes, flip, and bake for another 8 minutes until they begin to brown. 


Garlic Mayo Aioli 
2 tbsp light mayo (don't use fat free) 
1 tsp lemon juice
Hefty sprinkle of garlic powder (or you can sub minced garlic)
Salt and pepper to taste

Mix and enjoy!

Friday, January 25, 2013

Eggs Poached in Tomato Sauce

It's 6:30pm, and you're just getting out of work. In between checking your cell phone and figuring out when the next metro's coming, your stomach growls. Crap... you didn't get anything out for dinner, and by the sound of that growl, waiting for something to thaw or making a trip to the grocery store is just not an option. You're about to succumb to the temptation of Chipolte when you remember the latest Gourmet, My Way post. Let me introduce you to your new go-to dinner in a pinch: eggs poached in tomato sauce. It may not sound all that glamorous, but it's definitely delicious. This recipe is simple but hearty, and because it's quite adaptable, you're likely to have all the ingredients already on hand. 


Poached eggs are one of my favorite kinds of eggs. My mom used to make them for me whenever I was sick and mix them with cut up pieces of toast, so it's somewhat of a nostalgic food for me. These days, I enjoy them in a nice eggs benedict, atop a spinach salad, or... poached in tomato sauce! Start out by sauteing some onions and red pepper (or other veggies could work, too) over medium heat until tender. Turn down the heat to medium-low and add in enough tomato sauce to cover the bottom of the pot. I used a basic marinara pasta sauce, but tomato puree or a can of diced tomatoes would work as well. Spice it up with some garlic powder, onion powder, parsley, oregano, red pepper flakes, salt, and pepper. Now carefully crack your eggs directly on top of the sauce so that the eggs remain intact and cover. 


While the eggs are cooking, you can prep the rest of your meal. You'll definitely want some toasted bread for dipping. I went with a multigrain bagel -- Wegman's in-store bakery ones are great -- but a crusty slice of bread or a pita would work just as well. I also sauteed some zucchini as a side. Cook until the egg whites are no longer liquid, but be careful not to overcook -- you want the egg yolks to still be runny. (As a guide, they're getting close to being done in the photo above on the right.) To serve, scoop the contents of the pot into a bowl and top with some parmesan cheese (which will get all melty and delicious!) and another few shakes of your spices if you please. 


And there you have it, folks. A well-rounded, homemade meal in minutes. Enjoy!


Eggs Poached in Tomato Sauce

2 eggs
1/4 c. chopped onion
1/4 c. chopped red pepper
2/3 c. tomato sauce
Shredded parmesan cheese 
Sprinkle of: garlic powder, onion powder, parsley, oregano, red pepper flakes, salt & pepper


Coat the bottom of a small sauce pan with cooking spray or a light drizzle of olive oil. Cook the vegetables over medium-high heat until onions begin to become translucent.

Turn heat down to medium-low. Pour enough tomato sauce into the pot to completely cover the bottom (amount will depend on the size of your pot). Season your sauce to taste and stir.

Once sauce is begins to bubble slightly, crack eggs directly on top of the sauce and cover. Eggs are done cooking when whites are no longer liquid but yolk is still runny inside.

Remove from heat, top with cheese and more seasoning as needed. Serve with bread.

Tuesday, January 22, 2013

Farro, String Bean, Pomegranate Salad with Ginger Soy Sauce Dressing

Just got back yesterday from an amazing weekend getaway with some close friends to a cabin in the middle of no where -- it was rustic, charming, a bit chilly, but totally worth it. We made a ton of great food, including mountain pies (one with pizza sauce, tomatoes, cheese, and basil and another with nutella with strawberries!), two different kinds of soup, sausages with sweet potatoes and veggies roasted over the fire, and of course S'MORES! But given there was no internet or cell service (not to mention, running water), I took a bit of a food blog hiatus, so today's recipe is one I made for lunch last week. But not to worry -- I have a ton of great recipes lined up to make and share with you all later this week!
 
Before sharing today's recipe, I just wanted to give a little encouragement to those of you out there who might still be hesitant about giving cooking a chance... don't be afraid to make mistakes! Below you'll see my first attempt at making a mountain pie. Whoops! Guess I left it on the fire a little too long! But not to worry, the second one was perfect. If at first you don't succeed... toss your burnt sandwich out in the snow for the animals to eat and stick another one in the fire ;) 


On to the recipe! This was one of those lunches that I expected to be good, but nothing particularly special. Boy, was I wrong! Inspired loosely by this recipe from GreenLiteBites, this is definitely a recipe I'd make again (and that's saying a lot coming from someone who pretty rarely does repeats... after all, there's a world of recipes out there just begging to be tested!). 

I mentioned farro in an earlier post, but for those of you who aren't familiar, it's one of my new favorite grains. It's "heartier" than rice with a bit of a nutty flavor, but not overly "grainy" tasting either; give it a try and let me know what you think! If you don't have it on hand, though, feel free to sub in brown rice or another grain this time around. In addition, this is another one of those recipes where the measurements are flexible -- I'll tell you what I used, but feel free to adjust to your preferences. FYI: I needed to go heavier than listed in the recipe below on the amount of soy sauce I used because my soy sauce is very weak but if you have the potent stuff like they give out at Chinese food restaurants, add it in a little at a time or else you may end up with a salad that's way too salty. 


Farro, String Bean, Pomegranate Salad with Ginger Soy Sauce Dressing
 
¼ c uncooked farro
⅓ large ripe avocado
1 tbsp pomegranate seeds
¼ c raw onion
8-10 french string beans
Small handful of spinach
2-3 tsp soy sauce
Ground ginger
Garlic 

Cook farro according to package instructions. 

Meanwhile, steam string beans until slightly tender (put just a bit of water in the bottom of a bowl with the green beans; pop in the microwave for about one minute until they're no longer raw but still have a bit of a crunch). Cut into 1/2" pieces. Cube avocado, chop onion, and cut or tear spinach. Mix all of these ingredients plus the pomegranate seeds and the cooked farro in a bowl. 

In a separate small bowl, mix 2-3 tsp of soy sauce with ground ginger and garlic powder to taste. Pour over salad and mix well. Serve room temperature.